We finally finished the new keezer this week. I think it looks great. It took a lot more work than I anticipated but it was all a lot of fun. I tried to take pictures of every step so you guys could see. I’m going to try and be technical and specific enough that this post can be used as instructions on your own build.
Parts List:
1 chest freezer
1 temperature controller – I used the STC 1000 it’s cheap, simple, and easy to wire.
spray paint
10 ft 1×8” red oak
wood glue
screws
scrap wood
marine adhesive
spray foam insulation
polyurethane finish
paint brush
Chalkboard paint
4 tap and 4” shank combos
Foam board insulation
20 hose clamps
50 ft beer line
30 ft gas line
4 hose barb gas ball lock quick disconnects
4 hose barb beverage ball lock quick disconnects
1 5 lb CO2 tank
1 CO2 tank regulator
1 4 valve CO2 distributor
zip ties
ball lock kegs filled with homebrew
Tools we used:
A good drill and full drill bit set.
mitre saw
dremel – not necessary
That about sums it up. I got a bunch of the parts for Christmas.

I bought a new freezer on sale at home depot.

The only logo that could go on my keezer.


I had to touch up the paint some from where the tape pulled it off. You can also see the chalkboard paint on top so we can write what’s on tap.

We wired in the temperature controller so that it will interrupt the freezer’s condenser power when the temperature probe reaches the set temp. At this point, we began using the keezer as a fermentation chamber.

I made another parts order to get the last few things.

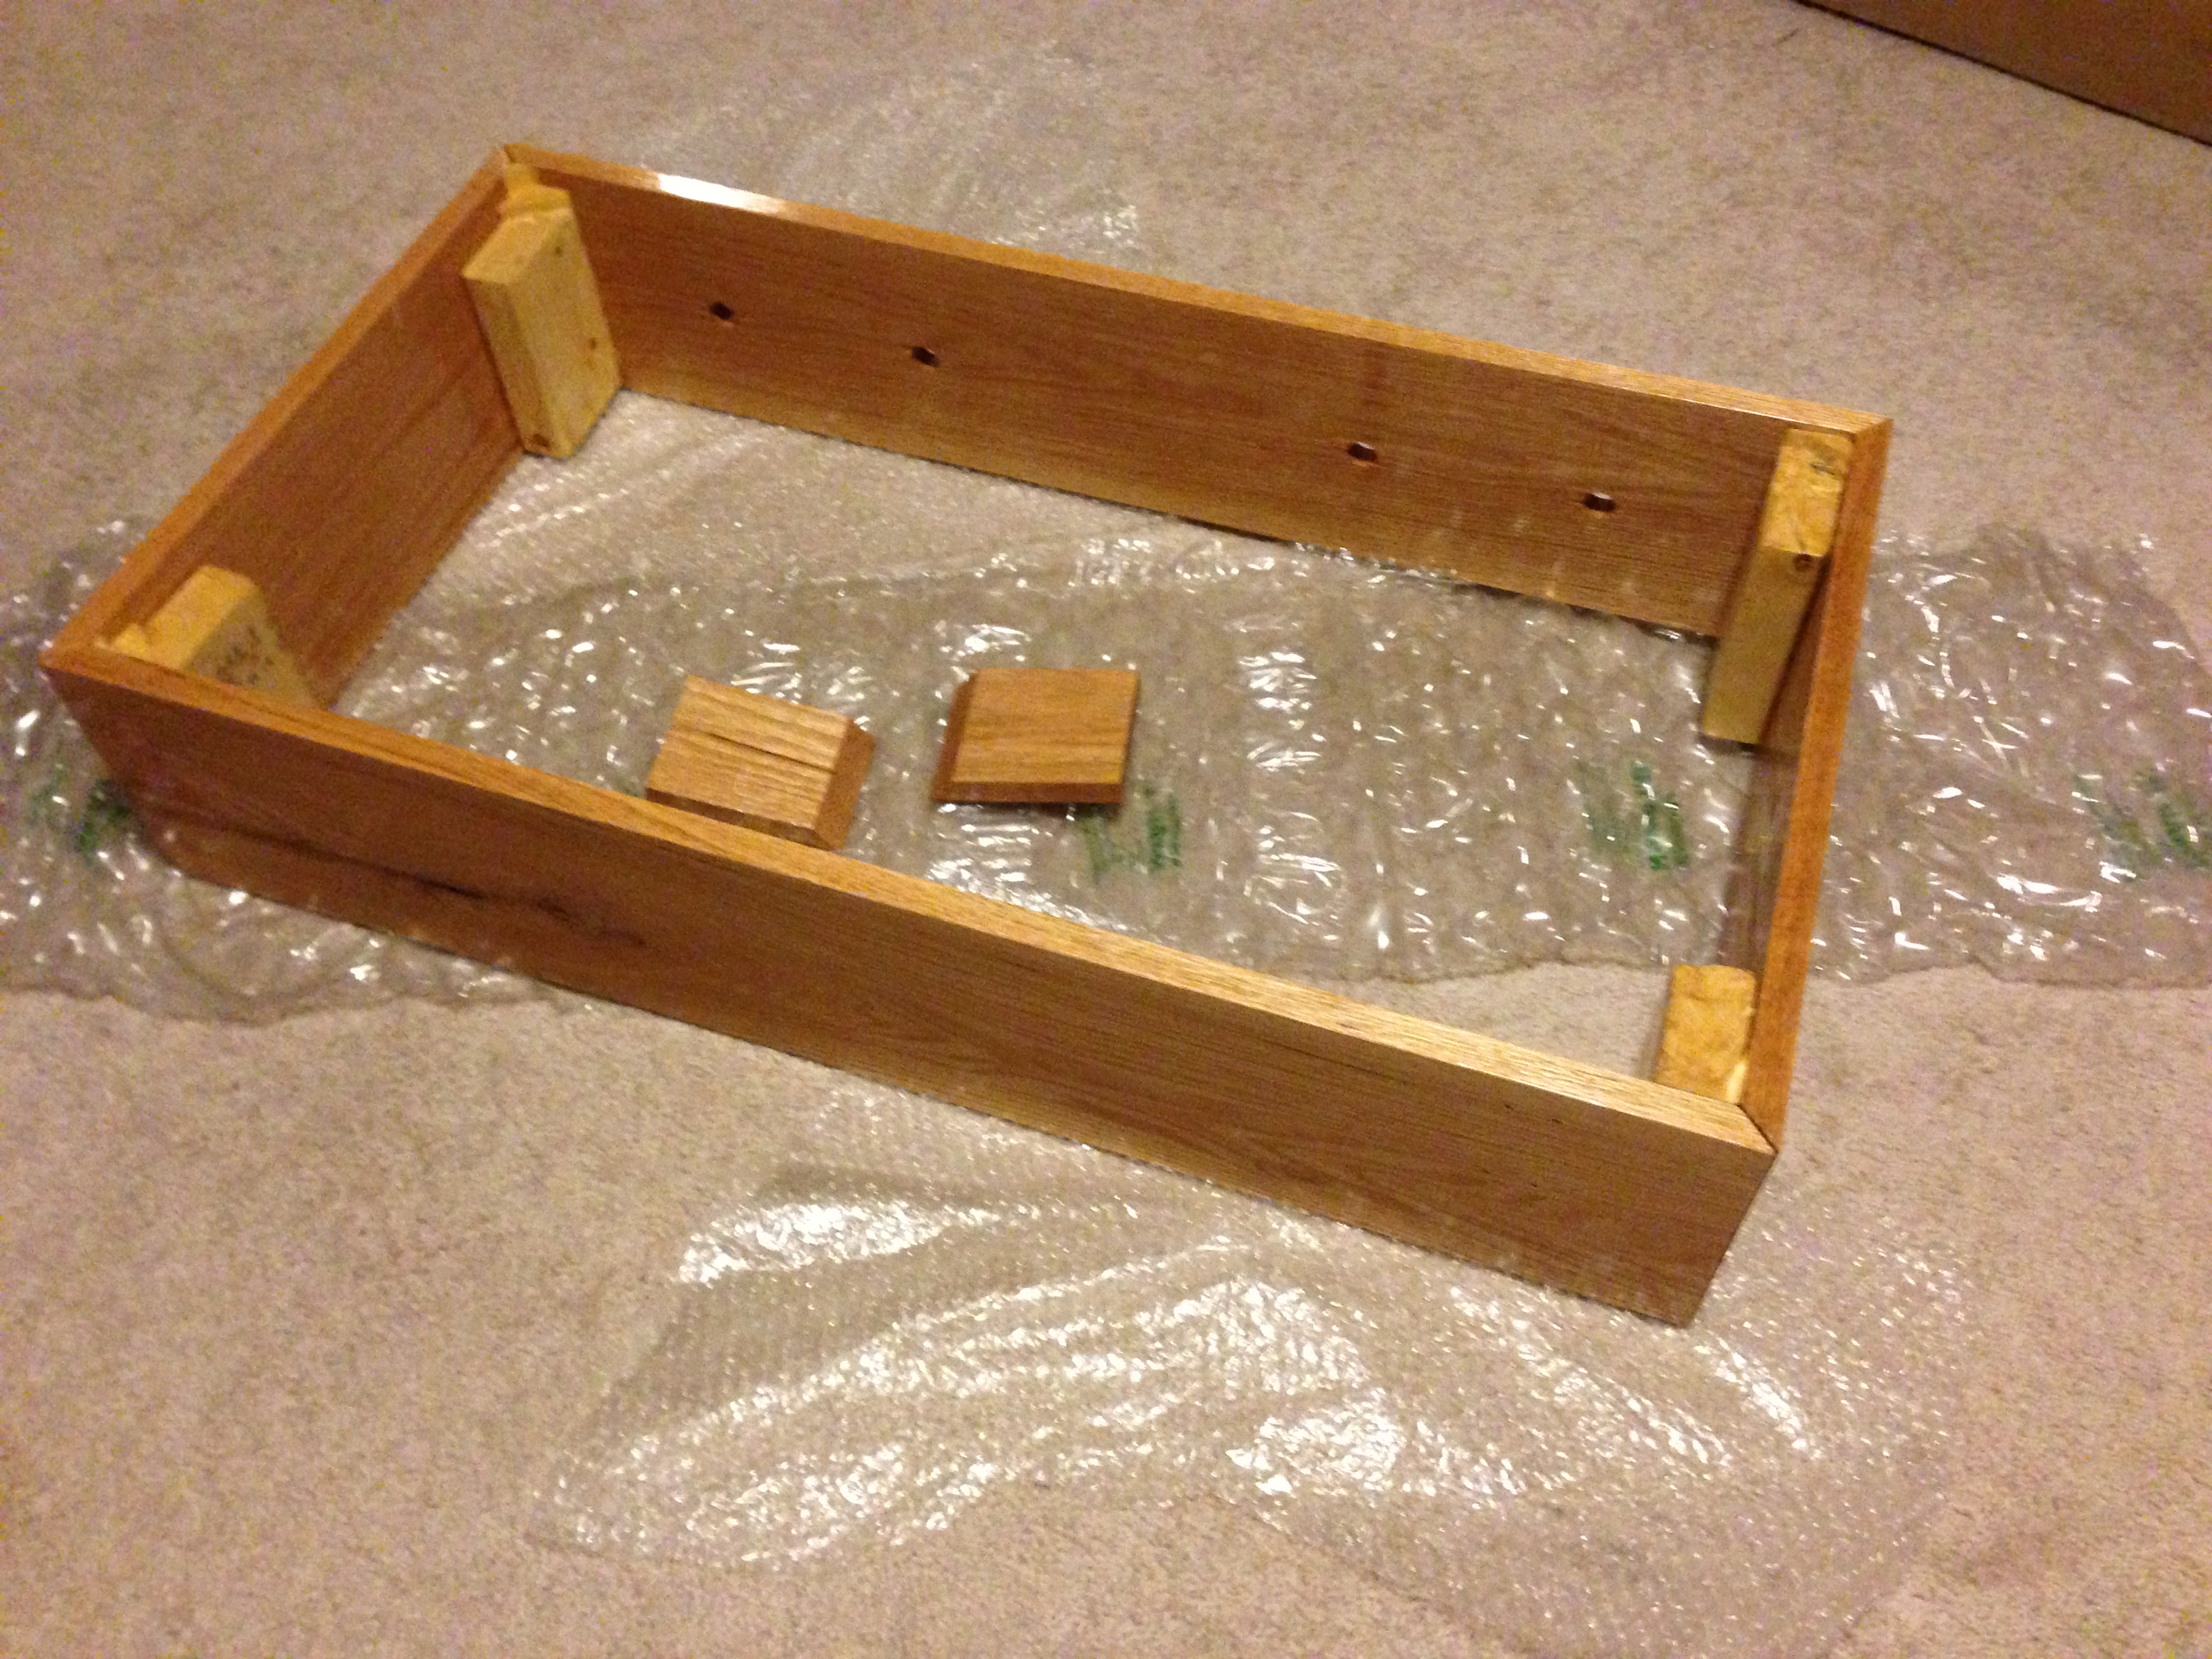
Here’s the oak pieces after being mitred to 45 degree angles on the corners and the tap and screw holes have been drilled out. After a few different rounds of sanding they were ready to fit together.

We took a magnet out of an old hard drive and embedded it in the wood. This sits right under the bottle opener and catches the caps.

We screwed and wood glued the corners together. We also realized that we are not the greatest carpenters, and had to make some adjustments along the way. I used the leftover sawdust and wood glue to fill behind the screws so they wouldn’t show.

Once it was assembled I sanded it down I applied some finish. This process was repeated several times to get a nice smooth surface.

Once the finish was dry we attached the collar to the lid. We had to dremel out some spacers for the hinges to attach to the lid at the appropriate distance. Next we attached the tap-shank combos (just a tap and a 4” shank). Then we cut the insulation board to line the inside.

After all the insulation was cut, we used marine adhesive to attache the collar to the freezer, and the insulation to the collar. The weights helped keep the collar in place and flush against the freezer.

Spray foam is your friend. I filled all the gaps so we wouldn’t leak all the cold air.

Here you can see the cap catching magnet in action. You might also notice the screw holes filled with a wood glue – saw dust mixture.

All dry and ready to serve beer.

This is what it looks like all wired up. The CO2 tank and regulator are screwed together, then gas is routed to the distributor, which splits it 4 ways to each of the kegs. The kegs each have their own 10 ‘ beverage line which connects to a shank / tap combo.

The beverage lines should each be 10 ‘. This will allow you to keep the CO2 regulator at carbonation pressure (10 psi) and serve at the same time. I zip tied all my lines to keep them organized inside the freezer.

A quick view of the gas lines shows the CO2 going from tank to regulator to distributor to kegs. The white thing between the regulator and distributor is a gas quick disconnect so we can easily and quickly remove the tank.

The finished product. I’m really happy with the aesthetic and function. We’ll see how well it serves the masses at our Super Bowl party this Sunday.


You may have noticed that there are no drip trays. I didn’t want to get them because
1. They’re expensive
2. They fill up with beer
3. That beautiful paint job
So I’m working on a different solution that I will post about soon.
On tap:
IPA
American Slammer Jammer Pale Ale
Milk Steak Stout
Fermenting:
Reisenbeer (Rye IPA)
Brewing:
American Slammer Jammer 10 gallon batch

Looks great, minus that awful paint job.
Well, if the UVA Engineers ever catch up and build one they can paint theirs blue!
What was the drip tray solution?
I hung solo cups from the taps by string. That way they’re really easy to empty and clean.